

Rubik’s Cube Challenge Part 2
Welcome to the Milford Public Library RUBIKS Cube Challenge!
Skills to build:
– Problem solving, memorization, fine motor skills, spacial reasoning, and advanced mathematics.
Review:
– Last time, we established the different notations for each face of the RUBIKS Cube and how to rotate them.
– To avoid confusion, we must choose a Start Position before we make any rotations.
– F (Front) and B (Back) are opposite sides.
– R (Right) and L (Left) are opposite sides.
– U (Up) and D (Down) are opposite sides.
– F, B, R, L, U, and D are rotations 90 degrees clockwise.
– Fi, Bi, Ri, Li, Ui, and Di are rotations 90 degrees counterclockwise.
– Clockwise and counterclockwise rotations are relative to each face as if you were looking at them.
– Any rotations involving the Front face and the Up face are easy, since Start Position has you looking at those faces. In order to rotate the Back, Down, Right, and Left faces, it can very helpful to briefly look at those faces as you rotate them.
How to Solve a RUBIKS Cube:
– Like most things, we solve the RUBIKS Cube one step at a time. Assuming your Cube is mixed up, the first step is to solve only one face. For the purposes of this guide, we will start solving the White face.
– Remember, White and Yellow will always be opposite sides of the RUBIKS Cube. When the RUBIKS Cube is mixed up, each center square tells you what color all nine squares on that face will be.
– First, we will create a White plus sign (+) also known as “The White Cross.” For now, we are not going to worry about what color the corner squares are. We only care about the edge squares and bringing them next to the white center square.
– Your RUBIKS Cube will not look exactly the same as the pictures in this guide, and that is okay! Do your best to find the white edge squares and practice different rotations until you get “The White Cross.”
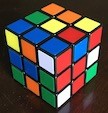
Start Position:
– The Up face will be Yellow and the Front face will be Red. For now, this only applies to the center squares.
– The first and second White edge squares are brought to the Up face using this sequence of rotations:
R 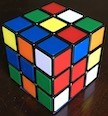 F
F 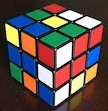 F
F 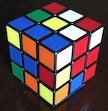
– The third White edge square is brought to the Up face using this sequence of rotations:
Di 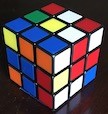 Ui
Ui 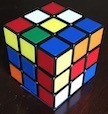 F
F  Li
Li 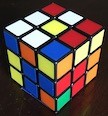
– The fourth and final White edge sqaure is brought to the Up face using this sequence of rotations:
U 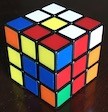 Li
Li 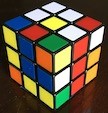 Li
Li 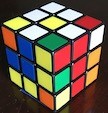
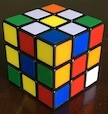
– The Up face now resembles a “White Flower” with four white “petals” and a yellow center.
– The four white edge squares also share the same color as the Right, Left, Front, and Back center squares.
– The Right center square is Green, the Left center square is Blue, the Front center square is Red, and the Back center square is Orange. See Hang on, I’m Stuck… below if you need help matching those edge square colors.
– Next, rotate the Right, Left, Front, and Back faces so that the White edge squares are brought next to the White center square, which is currently the Down face. We notate two identical rotations with the number 2:
R2 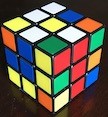 B2
B2 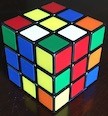 L2
L2 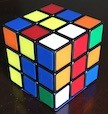 F2
F2 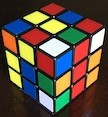
– Next, FLIP the RUBIKS Cube upside down. We now have “The White Cross.” You can ROTATE the RUBIKS Cube to check that the other sides are correct.
FLIP 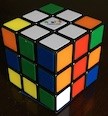 ROTATE
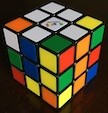
– We will complete the White face next time. Meanwhile, practice “The White Cross.” Great job!
Hang on, I’m stuck…
– If you are having trouble matching the edge square colors with the center squares, practice this sequence:
 Ui
Ui 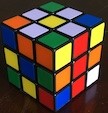 F2
F2 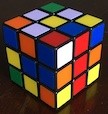
U2 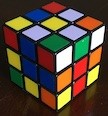 L2
L2 
Additional resources:
– Official website is https://www.rubiks.com/en-us/
– Practice using this handy online simulator! https://ruwix.com/online-puzzle-simulators/